Activities, Creative Learning, Family Fun, STEM |
Christmas is fast approaching and no matter how old you get, at Christmas time you are always a kid at heart! Keep your middle school kids fascinated by the wonderment of STEM by doing a few of these projects throughout the month. They combine science, technology, engineering, and math to form some pretty cool results!
Simple Science with Snow
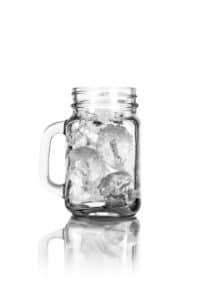
Soon the snow should be falling and that will be the perfect time to do this cool science experiment! First up, you’re going to need 3 mason jars. Fill one with ice cubes (not crushed ice), pack one with snow, and fill one about half way with tap water. Next, put the lids on tight and leave the jars on the counter.
 Ask your child what they think the control is in this experiment. The correct answer is the water because eventually, all of the jars will be filled with water. Next, ask why they think the lids are needed. They might say that they prevent evaporation and that is correct! It helps keep all the water inside the jars and prevents it from evaporating into the air.
Ask your children at the beginning of the experiment which jar would end up with the most water. Also ask them which do they think will melt faster, the snow or the ice. These are their hypothesizes. If they are making a quick guess, they might assume that the jar packed with snow might have the most water after it melts. Let them wait and see what happens!
Changes will start happening quickly, so encourage your child to make observations. They could document what they are observing in a science journal. Times should be noted along with their observations so they see how quickly (or slowly) changes are occurring. They’ll start to notice that the snow actually melts a lot faster than the ice cubes; however, very little water is left over once the snow melted.
 The ice could take up to a few hours to melt completely but when it’s done melting, how much water were they left with? The results usually surprise those making the observations. They are left wondering how did the ice cubes, which had a lot of air surrounding them in the jar, melt and give a higher volume of water than the snow? It’s all about the structure of the molecules!
Water molecules take on different structures depending on the state they are in. When water is frozen, it is in its solid state (ice). The molecules are tightly stacked together. If you take a look at the molecules of snow, their molecules fuse together into a crystallized form, giving us the amazing crystal patterns that come to mind when we think of a snowflake.
With this in mind, explain that even though the snow was hard packed into the mason jar, the molecules are still not as tightly fused as they are in the ice cubes. That’s why when the ice and snow melted, the ice yielded more water.
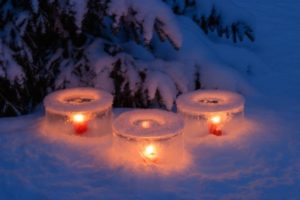
Crafting an Ice Lantern
This is a wonderful, easy outdoor decoration to make that will wow your friends and family every time they come over!
To get started, you will need the following supplies:
- Large plastic Solo cup
- Small plastic Solo cup
- Food coloring
- Tape
- Water
- Room in your freezer (or the outside temp must be below 32 degrees Fahrenheit)
- Candle, battery operated only
- Decorative items (beads, pipe cleaners, pompoms, tinsel, tiny bells, etc.)
To give you a quick synopsis of how this project works, you will add your decorations to the large cup, and then insert the small cup into the larger cup. You will then be adding water to the large cup, allowing it to freeze afterwards. The end result will be your ice lantern.
So, to first get started, have you child think carefully about how they will use their decorations. If you drop your beads, pompoms, and other tiny decorations inside the cup, they will just fall to the bottom. Have them think how they could use all of the decorative items to decorate the entire lantern, not just the bottom. Here’s a hint: they could spiral the pipe cleaners up the side of the cup. The will look like garland in your final lantern and will help to hold the other items in place as they are put in. Let your child know that no matter how carefully they lay out their decorations, they will move some when the water is poured in, and that’s OK.
After the larger cup has been decorated, slip the small cup inside of it. Now you will need to tape the smaller cup in place, so that both cups are level with each other.
It’s time to add the water! Carefully pour water into the larger cup. As you do this, you will notice that the little cup wants to rise. Adding a bit of weight to the small cup will help with that and will keep the cup securely in its place. You can add little stones or rice as easy weights. Fill the larger cup with water until it is about ¾” away from the top of the glass. You can add a few drops of food coloring to the water if you’d like.
 Place the cup in the freezer for several hours until it is frozen solid. Once it’s frozen, have your student look carefully and observe what happened. Even though the smaller cup was weighed down, it has now risen above the larger cup and the water has frozen to the top of the large cup. Explain that this is because the water molecules get tightly packed as the water freezes and it expands in size.
The next step is to carefully remove the cups, starting with the small cup. If the cup doesn’t easily remove, you may need to cut it and remove it in strips. Place your beautiful lantern creation outside for everyone to enjoy! Insert a battery operated candle and it will look beautiful (and since its battery operated, it won’t melt your lantern!).
Do you do any fun experiments with your 5-12th grader during the winter months? Let us know! Head over to our Facebook page and share your experiments with the My Virtual Academy community! If you have any other questions, feel free to call us at 800-297-2119.

Activities, Creative Learning, Family Fun, High School, Teenagers |
Have you thought about introducing your high schooler to the art of poetry? Believe it or not, this doesn’t need to be a drag or something they dread. In fact, by using different methods, teens will love poetry and at this age, poetry can be a great way to express their feelings and creativity. Teens from all over are obsessed with using various forms of printed material to create their poetry. This method is called Blackout Poetry and it’s all the rage.
With blackout poetry, the words that will be used appear in front of the poet in the form of the printed materials, but it’s up to them to breathe new life and significance into the words. The words will take on a whole new meaning as they work to create their poetry.
Blackout poetry is super cool and you only need three things to get started:
- Printed material (an old book/magazine/newspaper)
- Sharpie marker
- Some vivid imagination
The poet will use various words or phrases from the printed material as segments of their poem. Depending on the type of literature they choose to start with, the finished poems would range from silly and off-the-wall, to dark and mysterious. The haphazardness of it all is what makes it fun and unique!
Where to Begin
The student will start with the mindset that creating their poem will revolve around deconstructing their print piece, then reconstructing the words to create their literary masterpiece.

First, the student should read the full page, just as it is. As they read, they should keep an eye out for one word that stands out to them above the rest. This word is very significant and will be considered their “anchor word.” This word should stand out to them because it is powerful, important, and something that speaks to them. Their anchor word should be chosen wisely because it helps guide their imagination and helps shape their work. This word should allow them to spout off different ideas, themes, and topics for their poem. If they are unable to do that, back to the drawing board it is!
With that anchor word in mind, it’s time to reread the page, from top to bottom. As they go, they should circle the words that are related to the anchor word or any words/phrases that speak deeply to them. They will read words that jog an idea or inspire them in other ways – these are the keywords they should circle.
Next, get a separate piece of paper and write down all of the words that were circled in order that they appear in the book or magazine. It’s important to keep them in order and write them as they are written, working top to bottom and left to right. As to not confuse the reader, the completed poem will need to be written in this order.

On another piece of paper, start using some of the words you selected (keeping them in order) to construct the poem. Feel free to remove parts of the word as it might help with the flow of your poem. For example, -ing, -s, -ed endings can easily be removed if it makes the word work better within the poem. As the author of the poem, they may need to try writing several different poems before they find the one that resonates with them and sounds perfect. Often times, they need to revisit the page and see if they missed any words that could be used to help their poem come together. The word needed to complete their poem is usually hiding in plain sight on the page and they just need to take a moment to go back and find it.
Once the poem is perfected, erase the circles around the words that won’t be used in the poem. Next, think of an illustration that would reflect what your poem is about. Draw that over the remaining words that are on the page, being careful not to draw over any circled words. Next, take your black marker and draw lines through all of the words that are not circled or included in your illustration. Doing so will blackout everything except for the illustration they drew and the words used in their poem. The final result is your blackout poetry!
Check out the links below for some great inspiration for your poetry. It’s really amazing how creative and imaginative some students are!
How did it turn out? Did your teen enjoy creating poetry in this cool, unique way? What was their inspiration? We’d love to see what they came up with! Be sure to take a picture of their finished piece and upload it to our
Facebook page so we can share all of the wonderful poetic masterpieces!
Activities, Community Service, Family Fun |
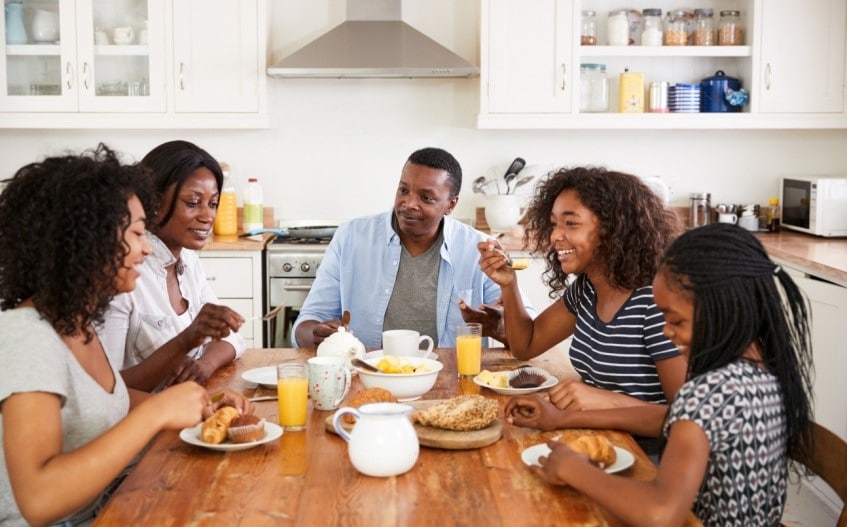
It’s that time of year again! The leaves are falling, turkey is to be had, and Thanksgiving is right around the corner. Now is the perfect time to turn your family’s attention away from football and the big feast and figure out ways to “give thanks” and give back to the community. Often times, especially during the hustle and bustle of the holidays, it’s easy to forget about those who are less fortunate than us. Sit down with your family and brainstorm various ways that your family can come together and give back to those in need.
To get the ideas flowing, we’ve jotted down some wonderful ways that your family can start to give thanks. Does your family already have a way that they give back and give thanks each year? Leave us a comment below or on our Facebook page. Let’s hear all the great ways that My Virtual Academy helps the community now and all year!
Fundraise for a charity
We’re all familiar with the Salvation Army bell ringers that are at storefronts during the holidays. They are hard at work in the frigid temperatures to raise money for those in need. Your child could do the same! Now, we don’t mean have your children ring bells or ask strangers for money, but maybe leave flyers on your neighbor’s doors stating that you are doing a bottle and can drive with the money benefiting a charity of your choosing. Or, you could go door-to-door asking for donations from those neighbors that you know. They also could ask bring up their fundraising endeavor to relatives and see if they will contribute.
Another fun, creative way to fundraise is to have your kids make holiday cards that they could sell individually or as a bundle of 5 or 10, with the money going towards the charity. Sometimes people like to feel that they are getting something in return for a donation and this would be a creative way to do so. If you choose to fundraise, please always make sure an adult is present when going around your neighborhood. It helps keep everyone safe and lets the homeowner know it’s a legit fundraiser.
Clothing and/or food drive
How many of us have old clothes lying around or clothes that their teen rapidly grew out of during their umpteenth growth spurt? Yes, us too! Why not hold a clothing drive? Shelters are ALWAYS in need of clothing, toiletries, shoes, food, etc. There are a ton of shelters, so all clothing sizes collected could certainly be used and appreciated. You would be surprised at the amount of clothing that people would donate to your cause when they hear you are collecting it. It saves them a trip to the thrift store and helps them thin down their closet!
In addition to clothes, food is of utmost importance for those in need. Collecting canned goods and other non-perishable items is easy, as most people have some that they don’t mind giving, especially during this holiday season.
Making and delivering meals
Volunteering in soup kitchens is a great thing and those kitchens always appreciate the extra help, but everyone and their brother volunteers there during the holidays. You’ll be tripping over other volunteers while you’re there so why not take your good intentions but redirect them to those surrounding you that might need a warm meal too? If you know of someone who might have handicaps that make it hard to make a meal or is elderly and could use some assistance, why not make a little extra at mealtime and make them up a plate? They would be happy to have the warm meal and the relieved burden that they didn’t have to worry about what to cook that night for dinner. Have a relative or neighbor who might be lonely? Why not invite them over to dinner? A hot meal and friendly conversation goes a long way and could make their day.
Handwritten notes of thanks
‘Tis the season for “giving thanks” so why not put the pen to paper and write a note of thanks? Have each person in your family write down people who made an impact on their lives or who simply did something nice or thoughtful that deserves recognition. The list could include teachers, coaches, mentors, tutors, siblings, parents, bosses, neighbors, etc.
You can either make the cards out of paper at home or purchase blank cards inexpensively at your local arts and craft supply store. Have each person pen a thoughtful letter giving thanks to that person in their life. Then, simply drop them in the mail with postage or hand-deliver them for an extra personal touch. We often think of things we wish we had said to someone once they are gone, so take this as a golden opportunity to let them know how much they mean to you.
November is a wonderful kick-off to the holiday season so start the season off right by lending a hand. Getting your kids involved teaches them from their youth that helping others in your community is an outstanding thing to do. After all, we know what they say, “it takes a village.”
Have you liked our Facebook page yet? Our staff at Back On Track is always sharing important information concerning both you and your student so head over and start following us today!
Activities, Creative Learning, Education, Family Fun |
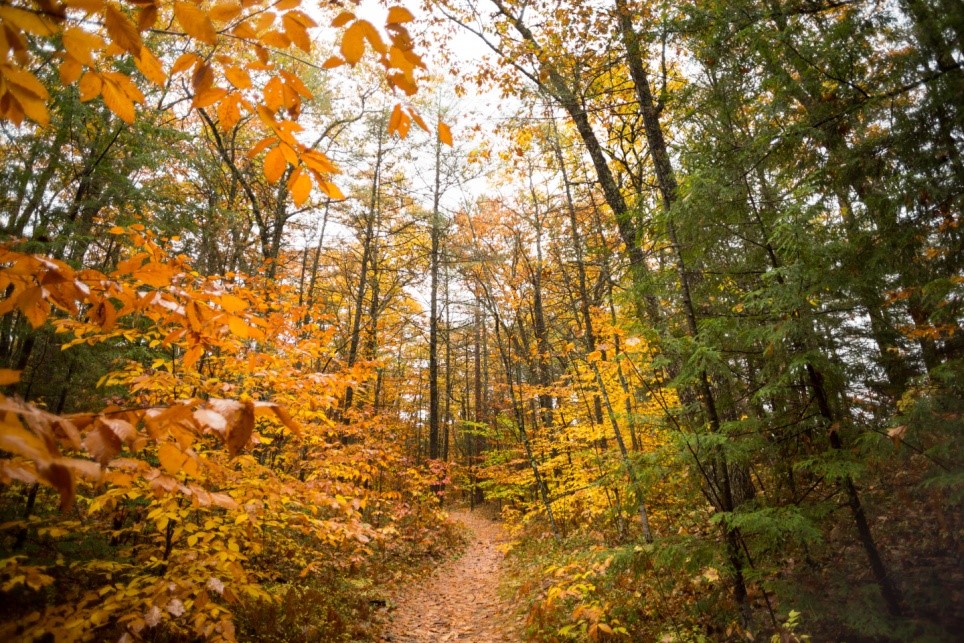
When fall finally rolls into town, we’re all ready for it! The dog days of summer have come and went and we are ready to start nestling down in our cozy sweaters and fall boots. It’s also a time when people love to be outdoors. The beautiful leaves are changing colors and beginning to fall, the air is crisp and fresh, bonfires are to be had and chili is to be made. It’s the perfect time of year, especially in Michigan!
To get your kids outdoors and active when the weather starts to dip, why not entice them with a fun fall scavenger hunt? There are all types of things they could look for and places to go do them. You could explore a nature center, a metro park, or even simply your own back yard.
Not only will the kids learn about science, but you can also incorporate math and maybe learn a bit about history too, depending on where you decide to hunt. Encourage kids to really take in the beauty and nature around them and look at things with a keen eye.
You may want to pack along binoculars, bug catchers, and magnifying glasses so they can observe what they see. Sometimes all it takes is looking at something in a different way to spark a love of nature in someone! Also, make sure to bring along a pencil for checking off the found items and a little Ziploc bag to bring home found treasures!
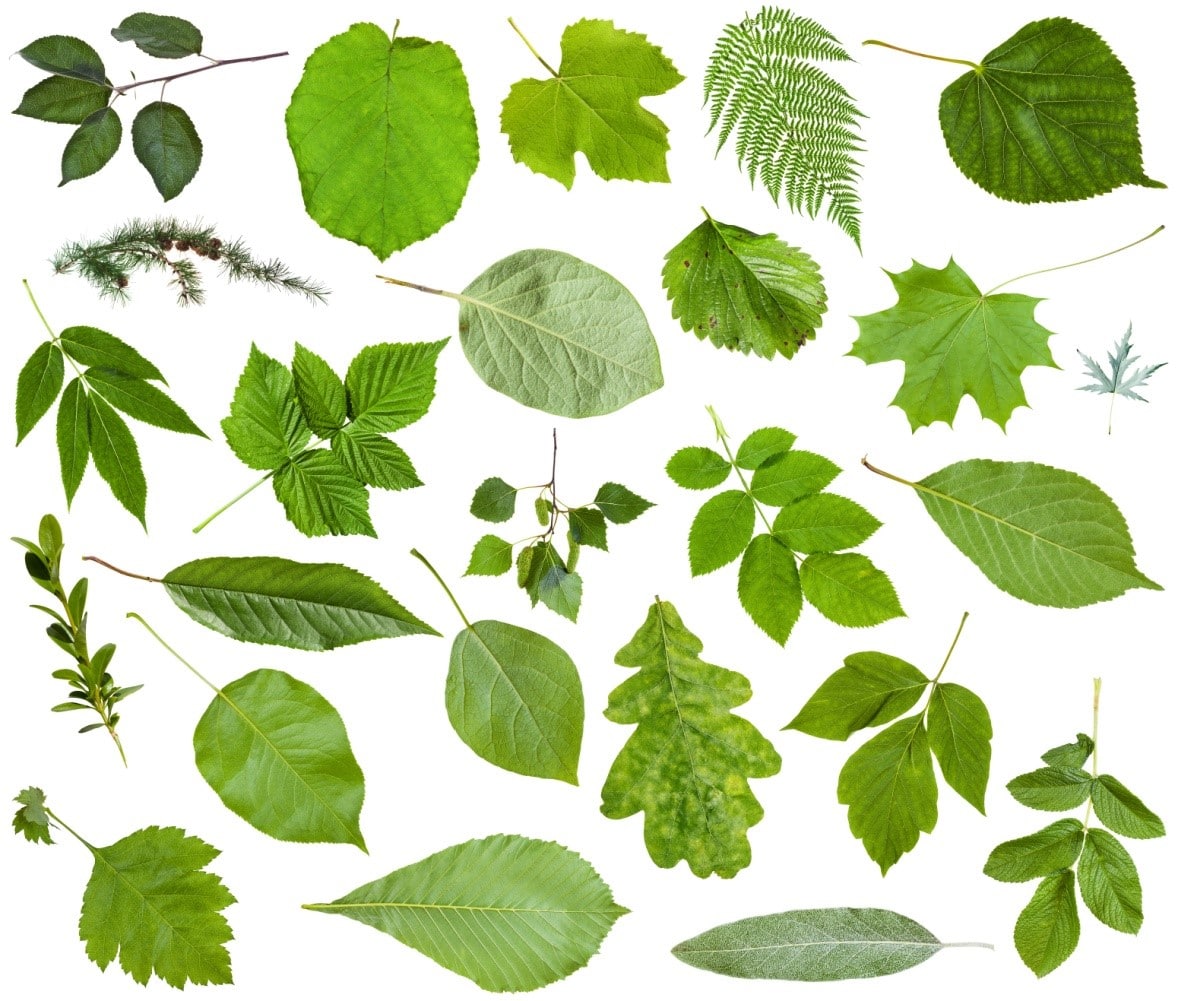
Scavenger hunts can be fun for all ages, too. Even the tiniest of kids can forage around looking for easy to spot things. As your children get up in age, make the hunt harder and include things like certain types of leaves, hard to find nuts or berries, and different types of animal tracks. It really is a fun event for all in the family, regardless of age!
We’ll provide links at the bottom to free printable scavenger hunt pages for your younger children, but if you have children that are older in age, don’t fret because there are plenty of ways to get them immersed in the outdoors too.
Middle Schoolers
As the parent of a tween, it can sometimes be a challenge to get them motivated and off the video games or phones and into the outdoors. If there’s something else that we know about tweens, it’s that they love to eat, so pack some of their favorite foods and hit the road. Pack a lunch and make an afternoon of your adventure! Drive a little bit to a new state/metro park where there is lots of room to roam and places to discover!
Next, try to look for new things, like fox tracks or unique birds that are native to that area. Kids this age will get bored if you make the scavenger hunt too simple. Asking them to look for harder to spot items will make your exploration that much more fun. If you have a tween who is resistant to the idea of a scavenger hunt, then take the lead and point out interesting or unique things along your walk. This will get them learning about their environment in a more subtle way.
Have activity trackers? Another way to get your middle schooler interacting with the outdoors is to put those puppies to use and have a good, old-fashioned competition! See who can get in the most steps by taking different paths to the creek or who can get their heart rate pumping when choosing the hilly trail instead of the flat, lower level trail.
Hiking is a sure fire way to build up your appetite so take a minute to meander over to the lake or a favorite spot you found along your path and have a picnic lunch. If you’re by the lake or pond, you could discuss what type of fish you think are in there, how different species affect the balance of the pond, and perhaps you could even discuss the types of boats you see on the water and why people chose to cruise on a kayak or sailboat versus a speed boat. The opportunity to learn and engage your child is everywhere you look when you are outdoors. Nature is your classroom and everything provides a learning experience!
High Schoolers
Getting your teens out for a fall nature hike is a bit easier than it is for those in the tween years. Often times, they are up for the exercise and enjoy a change of scenery. Offering to bring a friend or two along never hurt either!
Instead of having a print out of things they are looking for, keep your teens involved by stopping to point out things along the way that you find interesting or that they could research. For instance, if you find a patch of unique greenery, ask them if they know what it is. If they don’t, you could encourage them to bring out their cell phones, do some detective work, and determine what it is. Same goes for determining what type of trees are in their forest around them. Are the leaves broad or narrow? Soft or needle-like? Is the plant they see poisonous or okay to touch? Can they identify a bird just by their song?
The questions about things they will encounter are vast and by asking them to research and find out the answer, everyone will be learning!

Keep an eye out for the following and try to get your high schooler to identify them:
- Berries
- Trees
- Birds
- Plants
- Rivers and where they flow
- Various types of seeds or pods
- Animal holes or homes
You can learn things in any environment and at any age! The world is a great place to explore and there are many parts that remain unknown. Getting your child engaged and interested in the world around them will help them care for and protect our planet and is a great thing to do.
Have little ones and are looking for free printable scavenger hunt ideas for the fall? Check out these pages for great, easy-to-follow hunts for you child:
We have a passion for learning and would love to help instill that in your child too! If they are in grades 5-12, we would love to discuss how virtual learning could help your child. Please click here for more information. The staff at My Virtual Academy looks forward to hearing from you!
 Ask your child what they think the control is in this experiment. The correct answer is the water because eventually, all of the jars will be filled with water. Next, ask why they think the lids are needed. They might say that they prevent evaporation and that is correct! It helps keep all the water inside the jars and prevents it from evaporating into the air.
 The ice could take up to a few hours to melt completely but when it’s done melting, how much water were they left with? The results usually surprise those making the observations. They are left wondering how did the ice cubes, which had a lot of air surrounding them in the jar, melt and give a higher volume of water than the snow? It’s all about the structure of the molecules!
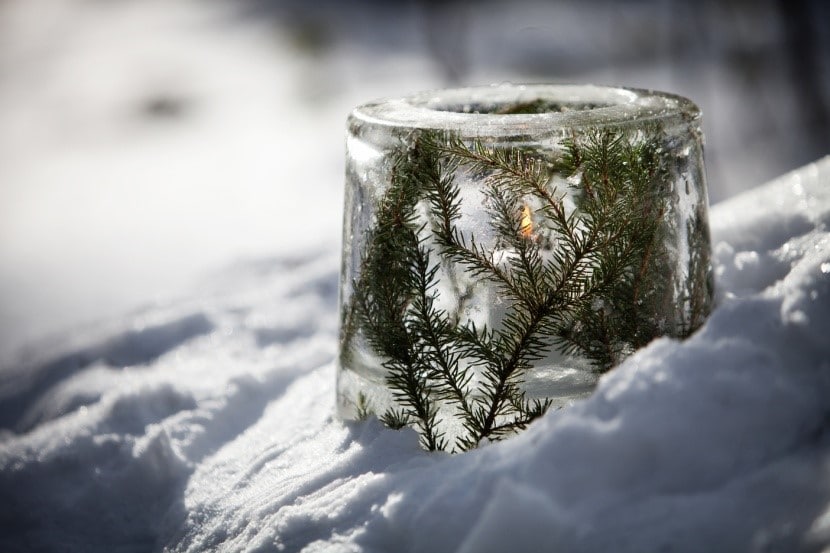
 Place the cup in the freezer for several hours until it is frozen solid. Once it’s frozen, have your student look carefully and observe what happened. Even though the smaller cup was weighed down, it has now risen above the larger cup and the water has frozen to the top of the large cup. Explain that this is because the water molecules get tightly packed as the water freezes and it expands in size.