Creative Learning, Education, mathematics, STEM, Uncategorized |
Many, many moons ago, a family was on vacation in Canada. The parents decided to take the family (mom, dad, and 4 youngsters) to see one of the 7 Wonders of the World – Niagara Falls! The beauty that beholds the Earth there is breathtaking. The water rushing over the edge, dropping hundreds of feet below. You can feel the strength and majesty of the Falls just by standing next to it. While everyone else was googling over the wonderment that is the Falls, one of the little girls in that family was tired and bored. She didn’t understand why they had to sit and stare at water. She wanted to go play and do something, anything, else. The little girl stood up and shouted at her parents, “What’s so big and bad about Niagara Falls anyway!?” People around the family laughed and the dad replied, “Honey, one day you’ll look back and laugh. You are too young to understand it now, but you are lucky to be here on this trip and should appreciate what’s around you.”
What’s so big and bad about Niagara Falls?
Often times, we find things in our lives to be tedious and “boring” because we don’t know what we’ll do with the information that we’re learning. Will we ever need to know how chemicals react? Will we ever use the information taught to us in algebra? Will we ever need to recall the names of the early explorers?
Your teen may have questions like those running through their heads as you are reading this. They may be annoyed that they are forced to study various subjects in school, such as math. They may be wondering, “What’s so big and bad about math?” We’ll tell them right now!

An easy way to let your teen know how important math is in their daily life is to relate it to something they are interested in and often times that is money! They know they need money in order to go out with their friends, put gas in their car, etc. They know they’ll need it in the future because they probably have envisioned a lavish lifestyle for themselves and that doesn’t come without a price tag attached. Knowing how to handle money and track it is all about math. They’ll need to know how to do percentages, balance a check book or ledger, pay bills; the list goes on and on!
Some teens might think that because they don’t plan on entering a field related to STEM upon graduation they won’t need to use math after graduation in their line of work. This couldn’t be farther from the truth. People don’t refer to math as the “universal language” for just any old reason. Math is used in all lines of work and actually, if your teen plans on attending a college or university, many won’t allow them to take certain classes until they have a few math classes and other prerequisites under their belt.
If someone just passed through their math class and made it by the skin of their teeth, they might have a hard time with everyday tasks that life presents. For example, they need math skills in order to calculate distances when they are on a road trip. Math skills come into play when cooking, baking, telling time, and even with keeping score when they play sports. Numbers are everywhere in our lives and it’s so important that they take learning math seriously.
When you learn math, you learn how to manipulate numbers but the skills you learn in math aren’t stagnant to just that subject. When your brain learns how  to solve math problems, you sharpen your logic skills along with your quantitative reasoning. These skills come together to help you throughout your life to become better at making decisions. You can logic things out and come up with a solution to problems that you’ll face.
A solid foundation in math will set your teen up for success at every stage of their life. It is a skill that simply cannot be done half-heartedly or taken lightly. At My Virtual Academy, it is our mission to have every student succeed. We work diligently with each student to ensure that their academic needs are being met. Our vision for your student doesn’t stop when they leave us after high school graduation. We take pride in ensuring they leave our school with the skills needed to take on the world.
Would your 5 –12th grader benefit from learning virtually in the comfort of their home? Visit our website by clicking here and see what we have to offer. You can also reach us at 800-297-2119 where we can answer any questions you may have. We look forward to hearing from you!

Activities, Creative Learning, Family Fun, STEM |
Students always look forward to a nice, long holiday break but as much as they look forward to it, it takes them about 3 nanoseconds before they utter the dreaded words: I’m bored! To keep things interesting this holiday break, keep these ideas in your pocket and when you hear those dreaded words, be sure to break one of them out to keep your kids entertained and maybe learning something along the way.
Take a break and bake!
Everyone loves enjoying some delicious cookies or cakes during the holidays so why not use this as an opportunity to whip up some new creations? Your culinary skills don’t need to be reserved just to baking – try making up a whole new dinner and follow it up with a delicious dessert!
Your child will learn all about measurements and how things interact with one another to combine and make a culinary masterpiece. To keep things interesting for your older teens, try having them triple the recipes. You could always freeze the dough for later while using it as a time to work on multiplying fractions. If baking cookies, you could decide to follow two different recipes, one that is for cake-like cookies and one that is for chewy. Discuss why the varying ingredients make a difference in the texture.
Do handwritten thank you notes.
Everyone loves to be thanked when they do something nice for someone and gift giving is obviously no exception. If your teen receives something as a gift during the holiday, encourage them to write a heartfelt note of thanks. This will teach them about gratitude as well as let the giver know how much the gift was appreciated. Challenge your teen to use 5 new descriptive words to practice and expand their vocabulary. Everyone is so used to doing things on a computer these days; it’s easy to forget the art of a nice, handwritten thank you note.
Visit the library.
Reading doesn’t just have to be done as a school assignment. Reading can be done for fun and is a good way to open the lines of communication with your child. You could set time aside to visit the library and then hold your own mini book club. You could either read the book together, discussing as you go, or read it separately and then talk about it once you are both done. Reading keeps our brains growing and developing and is the perfect way to pass time during the break.
Make a craft.
When the weather is frigid outside and you don’t feel like leaving the house, it’s the perfect time to pull your craft supplies together and make a new craft! Maybe you have washi tape and your teen wants to decorate their school supplies, like their stapler and pencil holder. Let them use their imagination and go to town! Perhaps they want to upcycle some of their old clothes into things that they’ll wear again. Go for it! Get those creative juices flowing.
Enjoy a museum.
There are a lot of things to explore when you turn to your local museums. Your teen could learn all about ancient Egypt and see mummies at the Detroit Institute of Arts. You could venture over to Cranbrook Institute of Science and explore all they have to offer. How about going to visit The Henry Ford? That’s one of our nation’s great treasures and it houses a lot of artifacts that your child is sure to find amazing.
Find activities at your local rec center.
Your local recreation center knows kids of all ages will be bored over break so they’ve been busy planning activities to keep their minds occupied! Head over to your local rec center’s website and check out all they have to offer. They usually do some type of dance classes, yoga, karate, crafting, and other local field trip type activities that will keep your kids busy and entertained.
Send them outdoors.
Cold weather typically brings snow and snow opens up a whole new world of outdoor activities. Why not encourage your teen to go skiing or snowboarding at your local ski hill? They could even join up with a bunch of friends and hit the local sledding hill for a couple of hours of fun. Physical activity is not only good for the body, but it’s good for the mind. Make sure they have warm gear and a snack and encourage them to get outside!
Encourage STEM activities.
STEM activities combine science, technology, math, and engineering to complete a project. Have your kids look up some videos on the internet and have them try to copy their project. Get them using their minds to build and create something. Let them use clay, computer coding, wood, batteries, whatever they need to safely make a STEM project. The internet has a vast array of options for winter STEM crafts and we’ve mentioned some on our blog before, so be sure to check them out.
What activities are you planning on doing when your kids are bored this break? Leave us a comment on our Facebook page! We’d love to hear what other families are planning and your comment might be helpful to someone else in our My Virtual Academy community.
If you have any questions regarding our program feel free to call 800-297-2119.

Activities, Creative Learning, Family Fun, STEM |
Christmas is fast approaching and no matter how old you get, at Christmas time you are always a kid at heart! Keep your middle school kids fascinated by the wonderment of STEM by doing a few of these projects throughout the month. They combine science, technology, engineering, and math to form some pretty cool results!
Simple Science with Snow
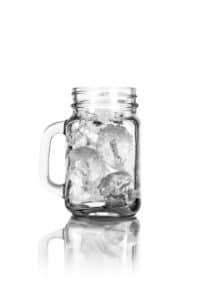
Soon the snow should be falling and that will be the perfect time to do this cool science experiment! First up, you’re going to need 3 mason jars. Fill one with ice cubes (not crushed ice), pack one with snow, and fill one about half way with tap water. Next, put the lids on tight and leave the jars on the counter.
 Ask your child what they think the control is in this experiment. The correct answer is the water because eventually, all of the jars will be filled with water. Next, ask why they think the lids are needed. They might say that they prevent evaporation and that is correct! It helps keep all the water inside the jars and prevents it from evaporating into the air.
Ask your children at the beginning of the experiment which jar would end up with the most water. Also ask them which do they think will melt faster, the snow or the ice. These are their hypothesizes. If they are making a quick guess, they might assume that the jar packed with snow might have the most water after it melts. Let them wait and see what happens!
Changes will start happening quickly, so encourage your child to make observations. They could document what they are observing in a science journal. Times should be noted along with their observations so they see how quickly (or slowly) changes are occurring. They’ll start to notice that the snow actually melts a lot faster than the ice cubes; however, very little water is left over once the snow melted.
 The ice could take up to a few hours to melt completely but when it’s done melting, how much water were they left with? The results usually surprise those making the observations. They are left wondering how did the ice cubes, which had a lot of air surrounding them in the jar, melt and give a higher volume of water than the snow? It’s all about the structure of the molecules!
Water molecules take on different structures depending on the state they are in. When water is frozen, it is in its solid state (ice). The molecules are tightly stacked together. If you take a look at the molecules of snow, their molecules fuse together into a crystallized form, giving us the amazing crystal patterns that come to mind when we think of a snowflake.
With this in mind, explain that even though the snow was hard packed into the mason jar, the molecules are still not as tightly fused as they are in the ice cubes. That’s why when the ice and snow melted, the ice yielded more water.
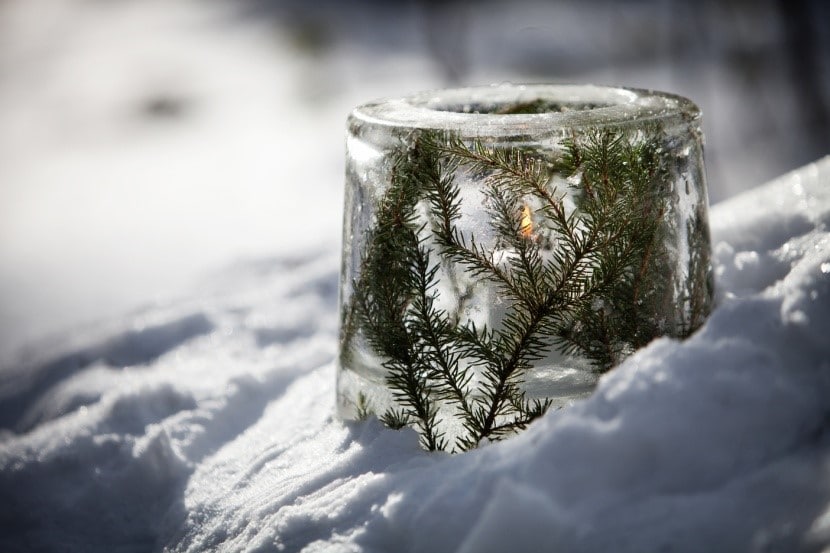
Crafting an Ice Lantern
This is a wonderful, easy outdoor decoration to make that will wow your friends and family every time they come over!
To get started, you will need the following supplies:
- Large plastic Solo cup
- Small plastic Solo cup
- Food coloring
- Tape
- Water
- Room in your freezer (or the outside temp must be below 32 degrees Fahrenheit)
- Candle, battery operated only
- Decorative items (beads, pipe cleaners, pompoms, tinsel, tiny bells, etc.)
To give you a quick synopsis of how this project works, you will add your decorations to the large cup, and then insert the small cup into the larger cup. You will then be adding water to the large cup, allowing it to freeze afterwards. The end result will be your ice lantern.
So, to first get started, have you child think carefully about how they will use their decorations. If you drop your beads, pompoms, and other tiny decorations inside the cup, they will just fall to the bottom. Have them think how they could use all of the decorative items to decorate the entire lantern, not just the bottom. Here’s a hint: they could spiral the pipe cleaners up the side of the cup. The will look like garland in your final lantern and will help to hold the other items in place as they are put in. Let your child know that no matter how carefully they lay out their decorations, they will move some when the water is poured in, and that’s OK.
After the larger cup has been decorated, slip the small cup inside of it. Now you will need to tape the smaller cup in place, so that both cups are level with each other.
It’s time to add the water! Carefully pour water into the larger cup. As you do this, you will notice that the little cup wants to rise. Adding a bit of weight to the small cup will help with that and will keep the cup securely in its place. You can add little stones or rice as easy weights. Fill the larger cup with water until it is about ¾” away from the top of the glass. You can add a few drops of food coloring to the water if you’d like.
 Place the cup in the freezer for several hours until it is frozen solid. Once it’s frozen, have your student look carefully and observe what happened. Even though the smaller cup was weighed down, it has now risen above the larger cup and the water has frozen to the top of the large cup. Explain that this is because the water molecules get tightly packed as the water freezes and it expands in size.
The next step is to carefully remove the cups, starting with the small cup. If the cup doesn’t easily remove, you may need to cut it and remove it in strips. Place your beautiful lantern creation outside for everyone to enjoy! Insert a battery operated candle and it will look beautiful (and since its battery operated, it won’t melt your lantern!).
Do you do any fun experiments with your 5-12th grader during the winter months? Let us know! Head over to our Facebook page and share your experiments with the My Virtual Academy community! If you have any other questions, feel free to call us at 800-297-2119.
Creative Learning, Family Fun, STEM |
There are tons of projects that you can do from home all year round that teach kids STEM, but with any holiday come new, exciting projects that are sure to keep your child entertained while learning a thing or two! Check out these Halloween themed STEM projects that are sure to have your child’s wheels spinning and creative juices flowing.
Magnetic Slime
Slime is all the rage these days and kids always seem eager to learn new ways to make this gooey, slimy, gross concoction. That’s where magnetic slime comes in! It’s super stretchy and squishy and does some pretty cool tricks, thanks to the addition of the magnetic element.

Here’s what you’ll need:
- ¼ cup Elmer’s glue
- ¼ cup Liquid starch
- Disposable bowls
- Craft sticks
- Disposable gloves
- 2 tablespoons Iron Oxide powder
- A really strong magnet
Here’s what you do:
- Put the liquid starch into a disposable bowl. Add the Iron Oxide powder and stir until well blended.
- To the bowl, add the Elmer’s glue and mix really well. It takes a while to incorporate, but just keep stirring.
- Put on your disposable gloves and now mix the slime with your hands. Knead well until it’s thoroughly mixed. If you get any black solution on your hands or arms, wash it off right away as it can stain.
- To rid any excess liquid from the slime, dry it gently with paper towel. Once the excess liquid is removed, you no longer have to worry about your hands turning black. It only happens in the liquid state. Once you’ve completed this step, it’s ready!
Try moving the magnet slowly over the slime and watch it dance and rise to the magnet. It’s really cool and your kids from elementary through middle school will enjoy this activity! (Just watch out for little tikes because magnets pose a choking hazard)
Pumpkin Catapults
Who doesn’t love trying to fling something across the room? Just about every kid I know would love to challenge their family or friends and see who can build the better catapult and toss their pumpkin the farthest. Get the challenge started!
Here’s what you need:
- Various size rubber bands
- Plastic teaspoons
- Masking tape
- Fat popsicle sticks
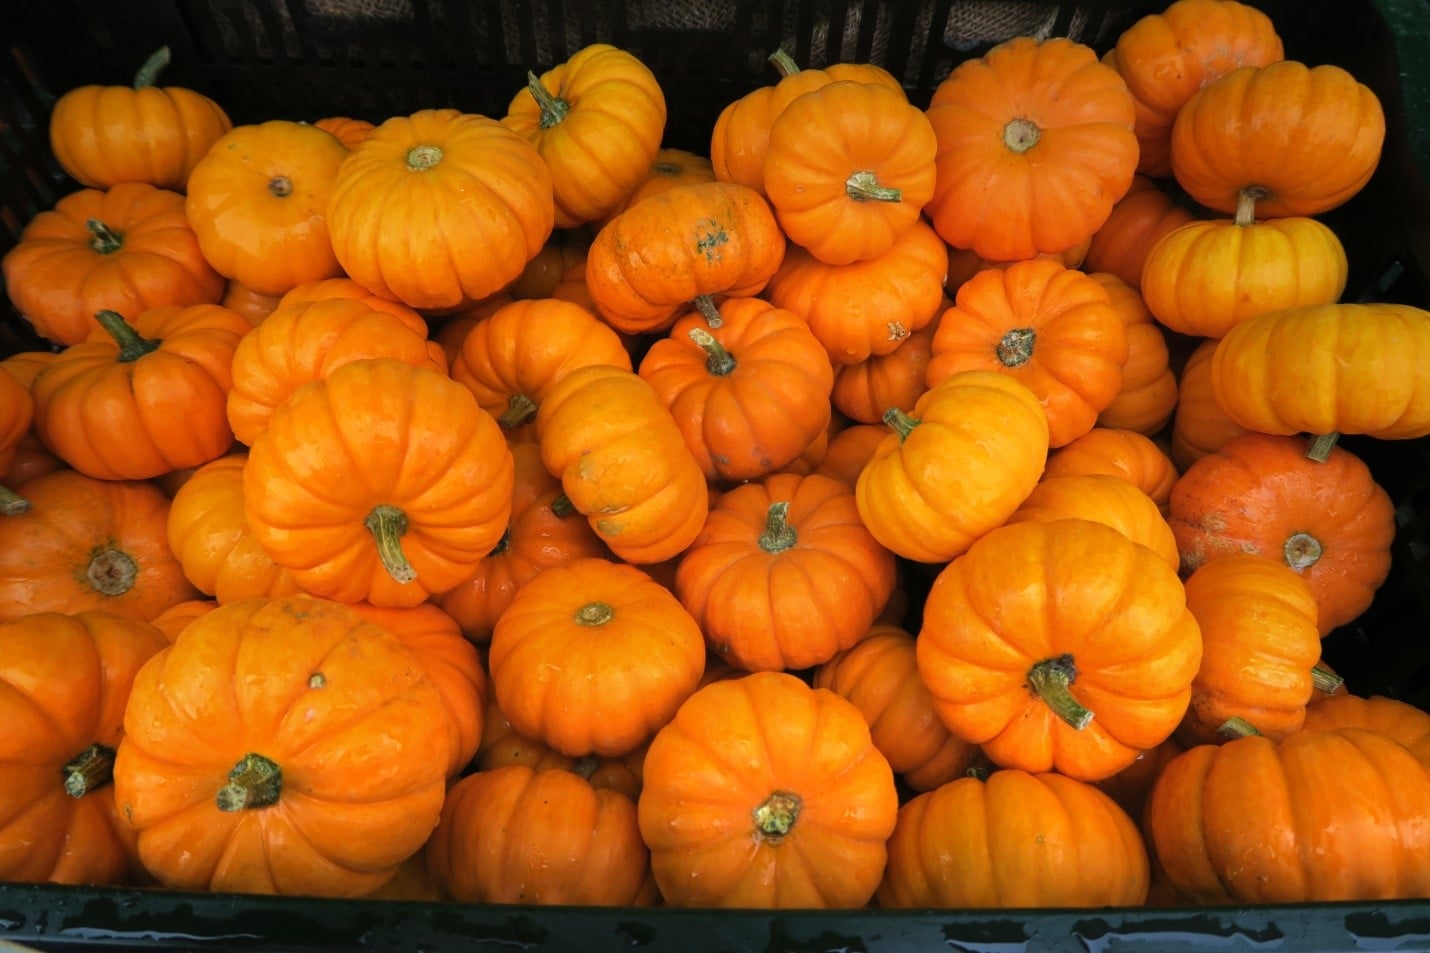
- Mini candy corn pumpkins
- Mini real pumpkins
Here’s what you do:
You child(ren) can use the various objects listed above to build their own catapult. As a suggestion, look up images of actual catapults on the internet so they can pay close attention to how they are crafted. They will probably notice that catapults have a strong, triangular base, require a wedge, and will need an arm to hold the pumpkin.
Once their catapults are built, have them do trial runs starting with the candy corn pumpkins and then take turns launching the real mini pumpkins. Have them measure the distance that each person achieved and then crown a winner!
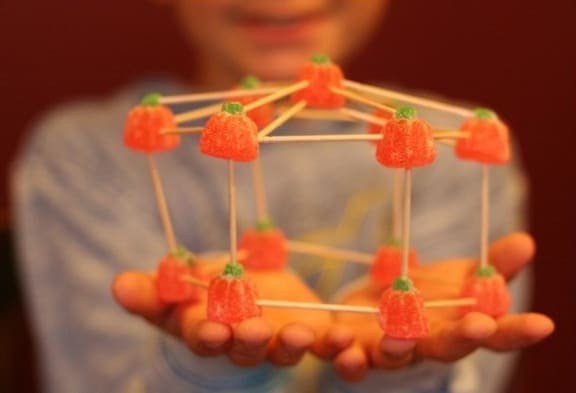
Pumpkin Castles
This is a great, fun little activity that even the littlest school-aged kids can do. It only requires to things (three, if you include a little bit of patience!) and is perfect for kindergarten and first graders!
Here’s what you need:
- Toothpicks
- Candy corn and pumpkins
Here’s what you do:
Put the toothpicks in one bowl and the candy in another. Working alongside your child, show them how to construct a castle by using the candy to hold the toothpicks in place. You can show them how to make squares for the base, triangles, pyramids, and cubes. Then, let them have at it and let their imaginations run wild! You’ll be surprised at what they come up with. The best part is at the end, they get to eat part of their creation!
Mutant Eggs
This experiment is so neat and with the added last step, makes it a fabulous, intriguing Halloween project!

Here’s what you need:
- Eggs
- Mason jars or any tall glass
- White or cider vinegar
- Corn syrup
- Green food coloring
Here’s what you do:
- Place the raw eggs into the jars and fill it with vinegar. You can loosely cover the jar if you wish and then leave it on the counter for 24-48 hours.
- Did your child notice any observations when the egg was submerged in the vinegar? Little bubbles formed because the carbon on the egg and the vinegar reacted, causing carbon dioxide bubbles.
- After the time is up, remove the eggs from the vinegar jar and make your observations! The egg no longer looks like a traditional egg. It’s more of a rubbery, balloon-like membrane. Gently rinse off the egg.
- Ask your child what happened to the shell. The shells of an egg are made up of two chemical elements: calcium and carbon. They stick to each other and form calcium carbonate crystals. Vinegar is very acidic and works to break apart the crystals so the shell dissolved and left us with that cool, rubbery membrane.
- In a clean jar, place the rinsed eggs and pour in enough corn syrup to submerge them. Add a few dots of green food coloring. Place the jar carefully in the refrigerator and let it sit for 24 hours. What you are left with are slightly shrunken, green mutant eggs!
- What did your child observe in this step? The egg has shriveled! The membrane let water molecules pass via a process called osmosis. Since corn syrup has almost no water, the water moves out of the egg and into the corn syrup, causing the egg to shrivel up.
We think your kids will have a spooktacular time making these fun and easy Halloween themed STEM projects!

 to solve math problems, you sharpen your logic skills along with your quantitative reasoning. These skills come together to help you throughout your life to become better at making decisions. You can logic things out and come up with a solution to problems that you’ll face.